In Malaysia, pineapple tarts are one of the cookies that you will always find in most homes for Chinese New Year. There are two types of pineapple tarts– the first one is the open faced variety which is the original version (which is also why this cookie is called a tart) and the second is the enclosed jam version (which I suspect came from Indonesia where many beautiful and time-consumingly designed versions of this cookie can be found).
Homemade Pineapple Tarts
I got this recipe from my third aunt, who through trial and error has created a really delicious, melt-in-your-mouth dough which is truly sublime. In some ways, I have always had some reluctance sharing this recipe because if there is one recipe that I feel is part of my family, this is probably it.
However, I am also one who doesn’t believe in hoarding recipes. And I also believe that the magic isn’t in the recipe anyway – it’s in the person using it. As many times as I’ve made this pineapple tart, the same cookie tastes a whole lot better baked by my aunt. It’s her skill and love and that extra something that makes the cookie better (which is why I would love to sit at her feet one day and just learn and absorb everything she has to teach me about baking).
So I will share this recipe and I hope you will find some of that magic in making it yourself.
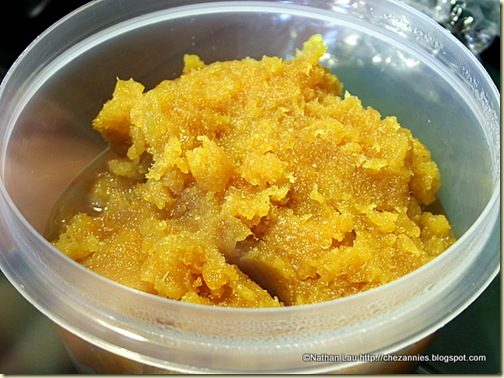
Before we begin making the cookie, we first have to make the jam.
Homemade Pineapple Jam
You have already done that, right? Alrighty then.
Easy Does it
The mixing of the pastry is actually really easy. You just dump all the ingredients into your mixer and mix it till it forms a dough. Easy peasy huh?
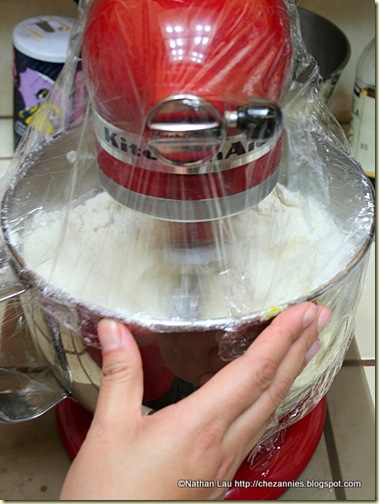
Well, pretty easy but I do want to share that this pastry dough makes quite a lot of cookies (about 8-12 dozen cookies, depending on the size of your cookies). Because of the amount of dough, when you’re mixing it, the flour could make quite a mess at the start of mixing. I’ve overcome this by placing plastic wrap over my Kitchen Aid mixer before turning the mixer on. This way the mess is contained and falls right back into the mixer (yes, you could use the KA shield but that just is so humbug and requires more washing).
Plastic Wrap over Kitchen Aid
So what makes this recipe so hard then? Well, it’s the time spent wrapping the cookie. The dough itself is really soft and buttery and will stick to your hands if it gets too warm. I recommend chilling the dough a little bit and also keeping a bowl of all-purpose flour on your work table to pat on your hands as you work on the cookie.
Pineapple Tart Pastry
(for enclosed jam version)
Ingredients
350g all-purpose flour (bleached is better)
350g cake flour (I use Softasilk brand)
500g butter
100g sugar
100g milk powder (I’ve used non-dairy creamer as a substitute)
1 whole large egg
2 egg yolks (save whites for other purposes)
1 Tbsp butter essence (optional)
Glaze
1 egg, lightly beaten
Method
1. Place parchment paper on your cookie sheets. Preheat oven to 350* F.
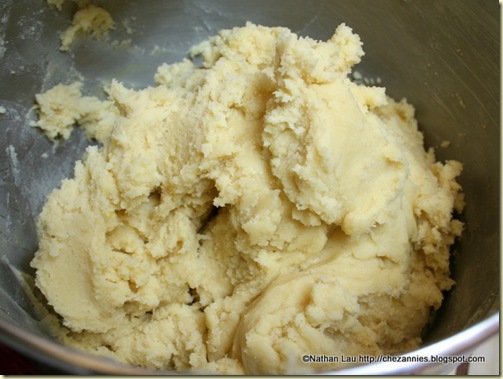
2. Measure and place all the ingredients in your mixer and mix on medium speed until it forms a dough. Chill for 10 minutes to firm up a little (you can use it immediately too).
Dough for Homemade Pineapple Tarts
3. Keeping your hands floured lightly, pinch off dough in about large marble sized pieces and roll into balls.
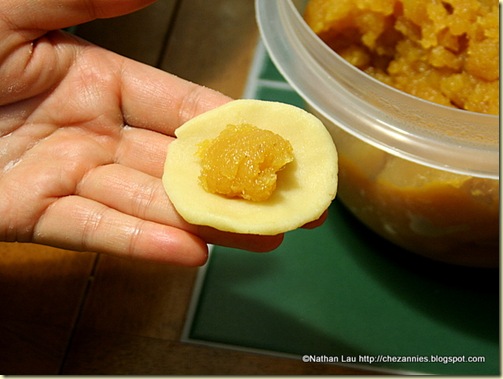
4. Press balls into circles and place a teaspoon of pineapple jam in the middle of the dough. Enclose jam with dough (practice makes you better at this, try to keep the pastry part thin, so that the cookie part won’t overwhelm the jam. Be careful that it’s not TOO thin as that would cause the jam to burst through).
Making Homemade Pineapple Tarts
5. The final shape is up to you. I tend to like to make them more oval because the original versions of these would be oval and then snipped all around with a small, sharp scissors to resemble a pineapple–much too much work for me! My aunt also used to roll them round and stick a clove into the top of each to resemble an apple.
6. Place them about an inch apart on the cookie sheet (or a little less space is ok too, they don’t expand too much).
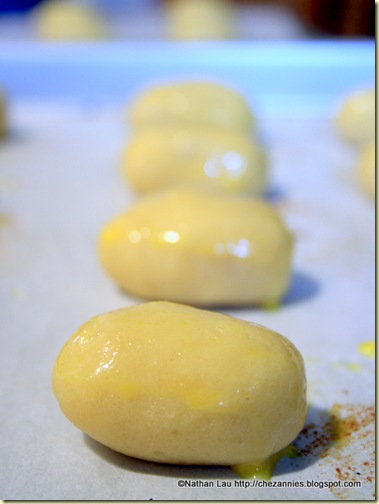
7. Brush the eggwash gently on the tops of the cookies.
Eggwash on Homemade Pineapple Tarts
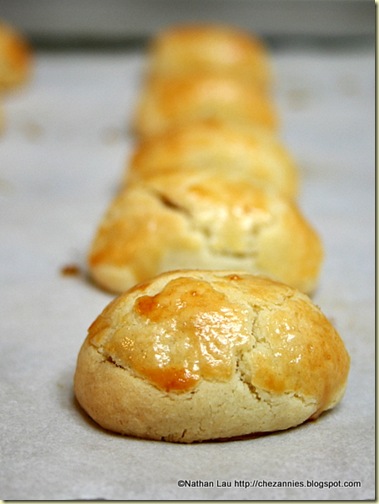
8. Bake until golden brown (about 20-30 minutes).
Enjoy!
Homemade Pineapple Tarts
*you might find yourself with more jam than cookies (depending on the size of the pineapples you bought). I got my pineapples from Costco and I still have about 1/3 of the jam left. They can be frozen and used later or I’ve also made an extra half portion of this recipe to use up the rest of the jam (if you have leftover cookie dough, just treat them like turnover dough and use fruit filling to use it up).
**don’t try to make open-faced cookies with this recipe. The dough is much too crumbly to hold up to that version. I will be trying out some open-faced versions soon with my leftover jam and I will share that recipe with you in another post.
Cheers, Annie
Hi Annie, i would like to try this recipes (Part1 & 2). Do you have an updated version? Also, do i need to keep the tarts in the refrigerator? if not, for how long they could stay? thanks
Also, i’ve read some recipes that requires the refrigeration of the jam before putting it in the tart, does your recipe also requires it? How dry should the jam be for this perfect p tart? thanks thanks
Hi, what oven type are you using- conventional or convection? tnx